Original date published: June 3, 2026
Building KAARL - A Multi-Node AI cluster infrastructure for rapid prototyping
Building KAARL - A Multi-Node AI cluster infrastructure with 4 x 4060ti, CUDA, Kubernetes and Ray to power AI workloads and experiments

KAARL Multi-Node GPU cluster
Weights of Frustration & Sparks of curiosity
While working on a project to train a small transformer model from the Andrej Karpathy NanoGPT tutorial, I got frustrated with the constant dependency on cloud providers for GPUs. You are either constantly battling for availability or having to perform tricks to prevent your current GPU allocation from being reallocated. If you've worked on AI-heavy projects you'd know that at the very early experimentation phases you need stable GPU availability to be able to run multiple different experiments. After jumping across several subscriptions from various cloud providers I was sufficiently pissed off. I had also been reading a lot about GPUs, infrastructure, home servers, local AI etc.
As any sane person would conclude, the next obvious step is to build my own GPU infrastructure. I needed something that was good enough for me to run small experiments locally that I could then move to larger instances when I was sure of the nature of the experiment or wanted to run bigger model variants. The platform would serve as a test bed for my curiosities.
So, I went to Amazon and started picking out the components I would need. I settled on 4 x 4060ti's (16GB VRAM) distributed across two nodes, with each node having 2 GPUs. Each node also has 2 x 32GB memory and 512GB SSD storage attached. I also included an 8TB HDD storage disk attached to one of the nodes to serve as a network file system; this would be used to store the various model weights and datasets I would be using for my experiments. I also chipped in 4 x Nvidia Jetson Nanos for running edge robotics projects.
There are a lot more materials and components used for building this. You can find the BOM here. You can use this as a reference for your own build as well. The rest of this post goes over the details of how I built the infrastructure and set up CUDA, Kubernetes and Raylib to run AI projects.
The Hardware
Component List
The cluster primarily consists of two identical nodes. Each node was built from individual components.
| Component | Spec |
|---|---|
| CPU | AMD Ryzen 7 5800x (8-core, 16-thread, 3.8GHz base, 2 x PCIe lane motherboard) |
| Motherboard | MSI MAG B550 Tomahawk MAX WiFi |
| RAM | CORSAIR VENGEANCE LPX (32 x 2) DDR4 memory |
| Storage (OS) | Ediloca EN605 512GB |
| Storage (Data) | Seagate Portable Drive 8TB, External Hard Drive, Dark Grey |
| Case | XIANXIAN Mining Rig Frame 12 GPU |
| GPU | MSI GeForce RTX 4060 Ti (16G Graphics Card - RTX 4060 Ti GPU, 16GB GDDR6 (18Gbps/128-bit)) |
| PSU | Corsair RM850e |
Total across cluster:
- 4× RTX 4060 Ti (64GB VRAM total)
- 16 CPU cores per node (32 total)
- 128GB RAM total
- ~6.5TB usable storage
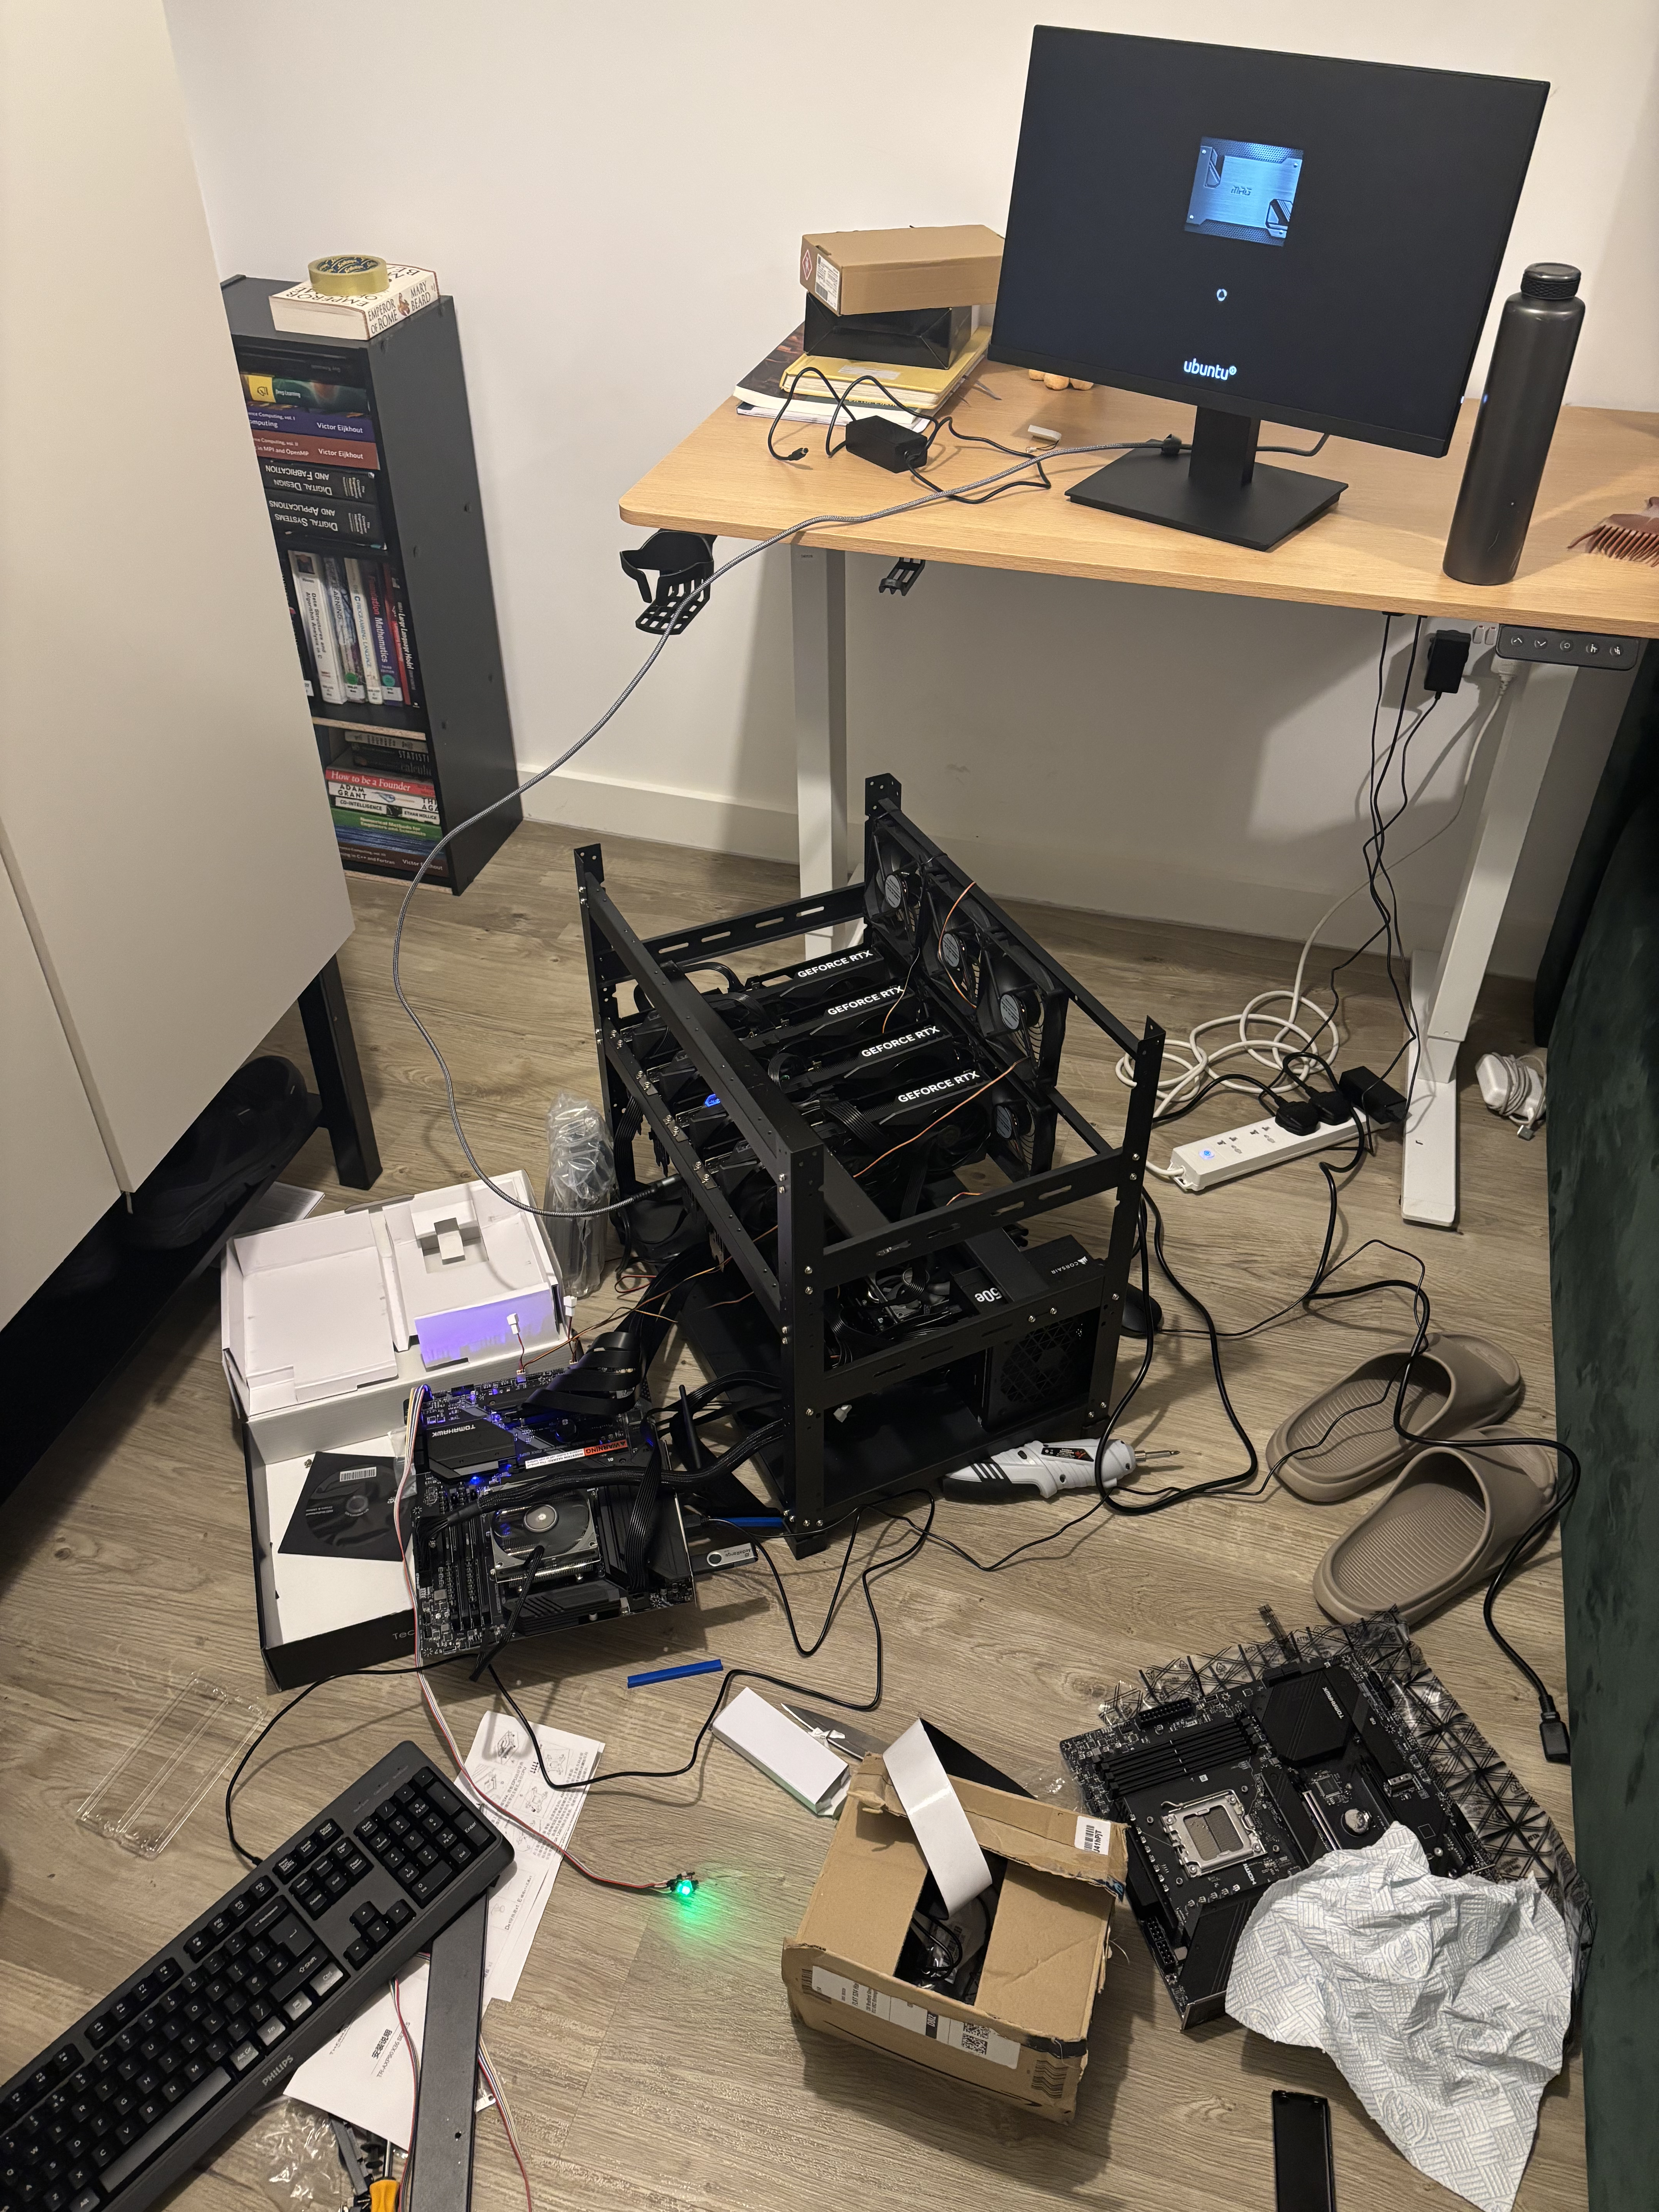
KAARL Cluster In Progress
GPU Purchase Notes
The 4× RTX 4060 Ti 16GB cards were purchased separately from Amazon. Key considerations when buying:
- Buy the 16GB variant — the 8GB version exists and is cheaper, but 16GB is essential for running large models. Double-check the listing.
- Check PCIe slot availability — the MSI B550 Tomahawk has 2× PCIe x16 slots, accommodating 2 GPUs per board comfortably.
- PSU headroom — each RTX 4060 Ti has a 165W TDP. With CPU and other components, budget at least 650–750W per node.
Physical Assembly Notes
- The open rack chassis means no traditional case airflow. Ensure GPUs have clearance and adequate airflow across the PCIe slots.
- Seat both GPUs firmly in the PCIe x16 slots and connect the 8-pin/16-pin power connectors from the PSU.
- Connect both nodes to a dedicated managed/unmanaged network switch via ethernet. This switch handles all cluster communication (Kubernetes, Ray, NCCL for GPU-to-GPU data transfer).
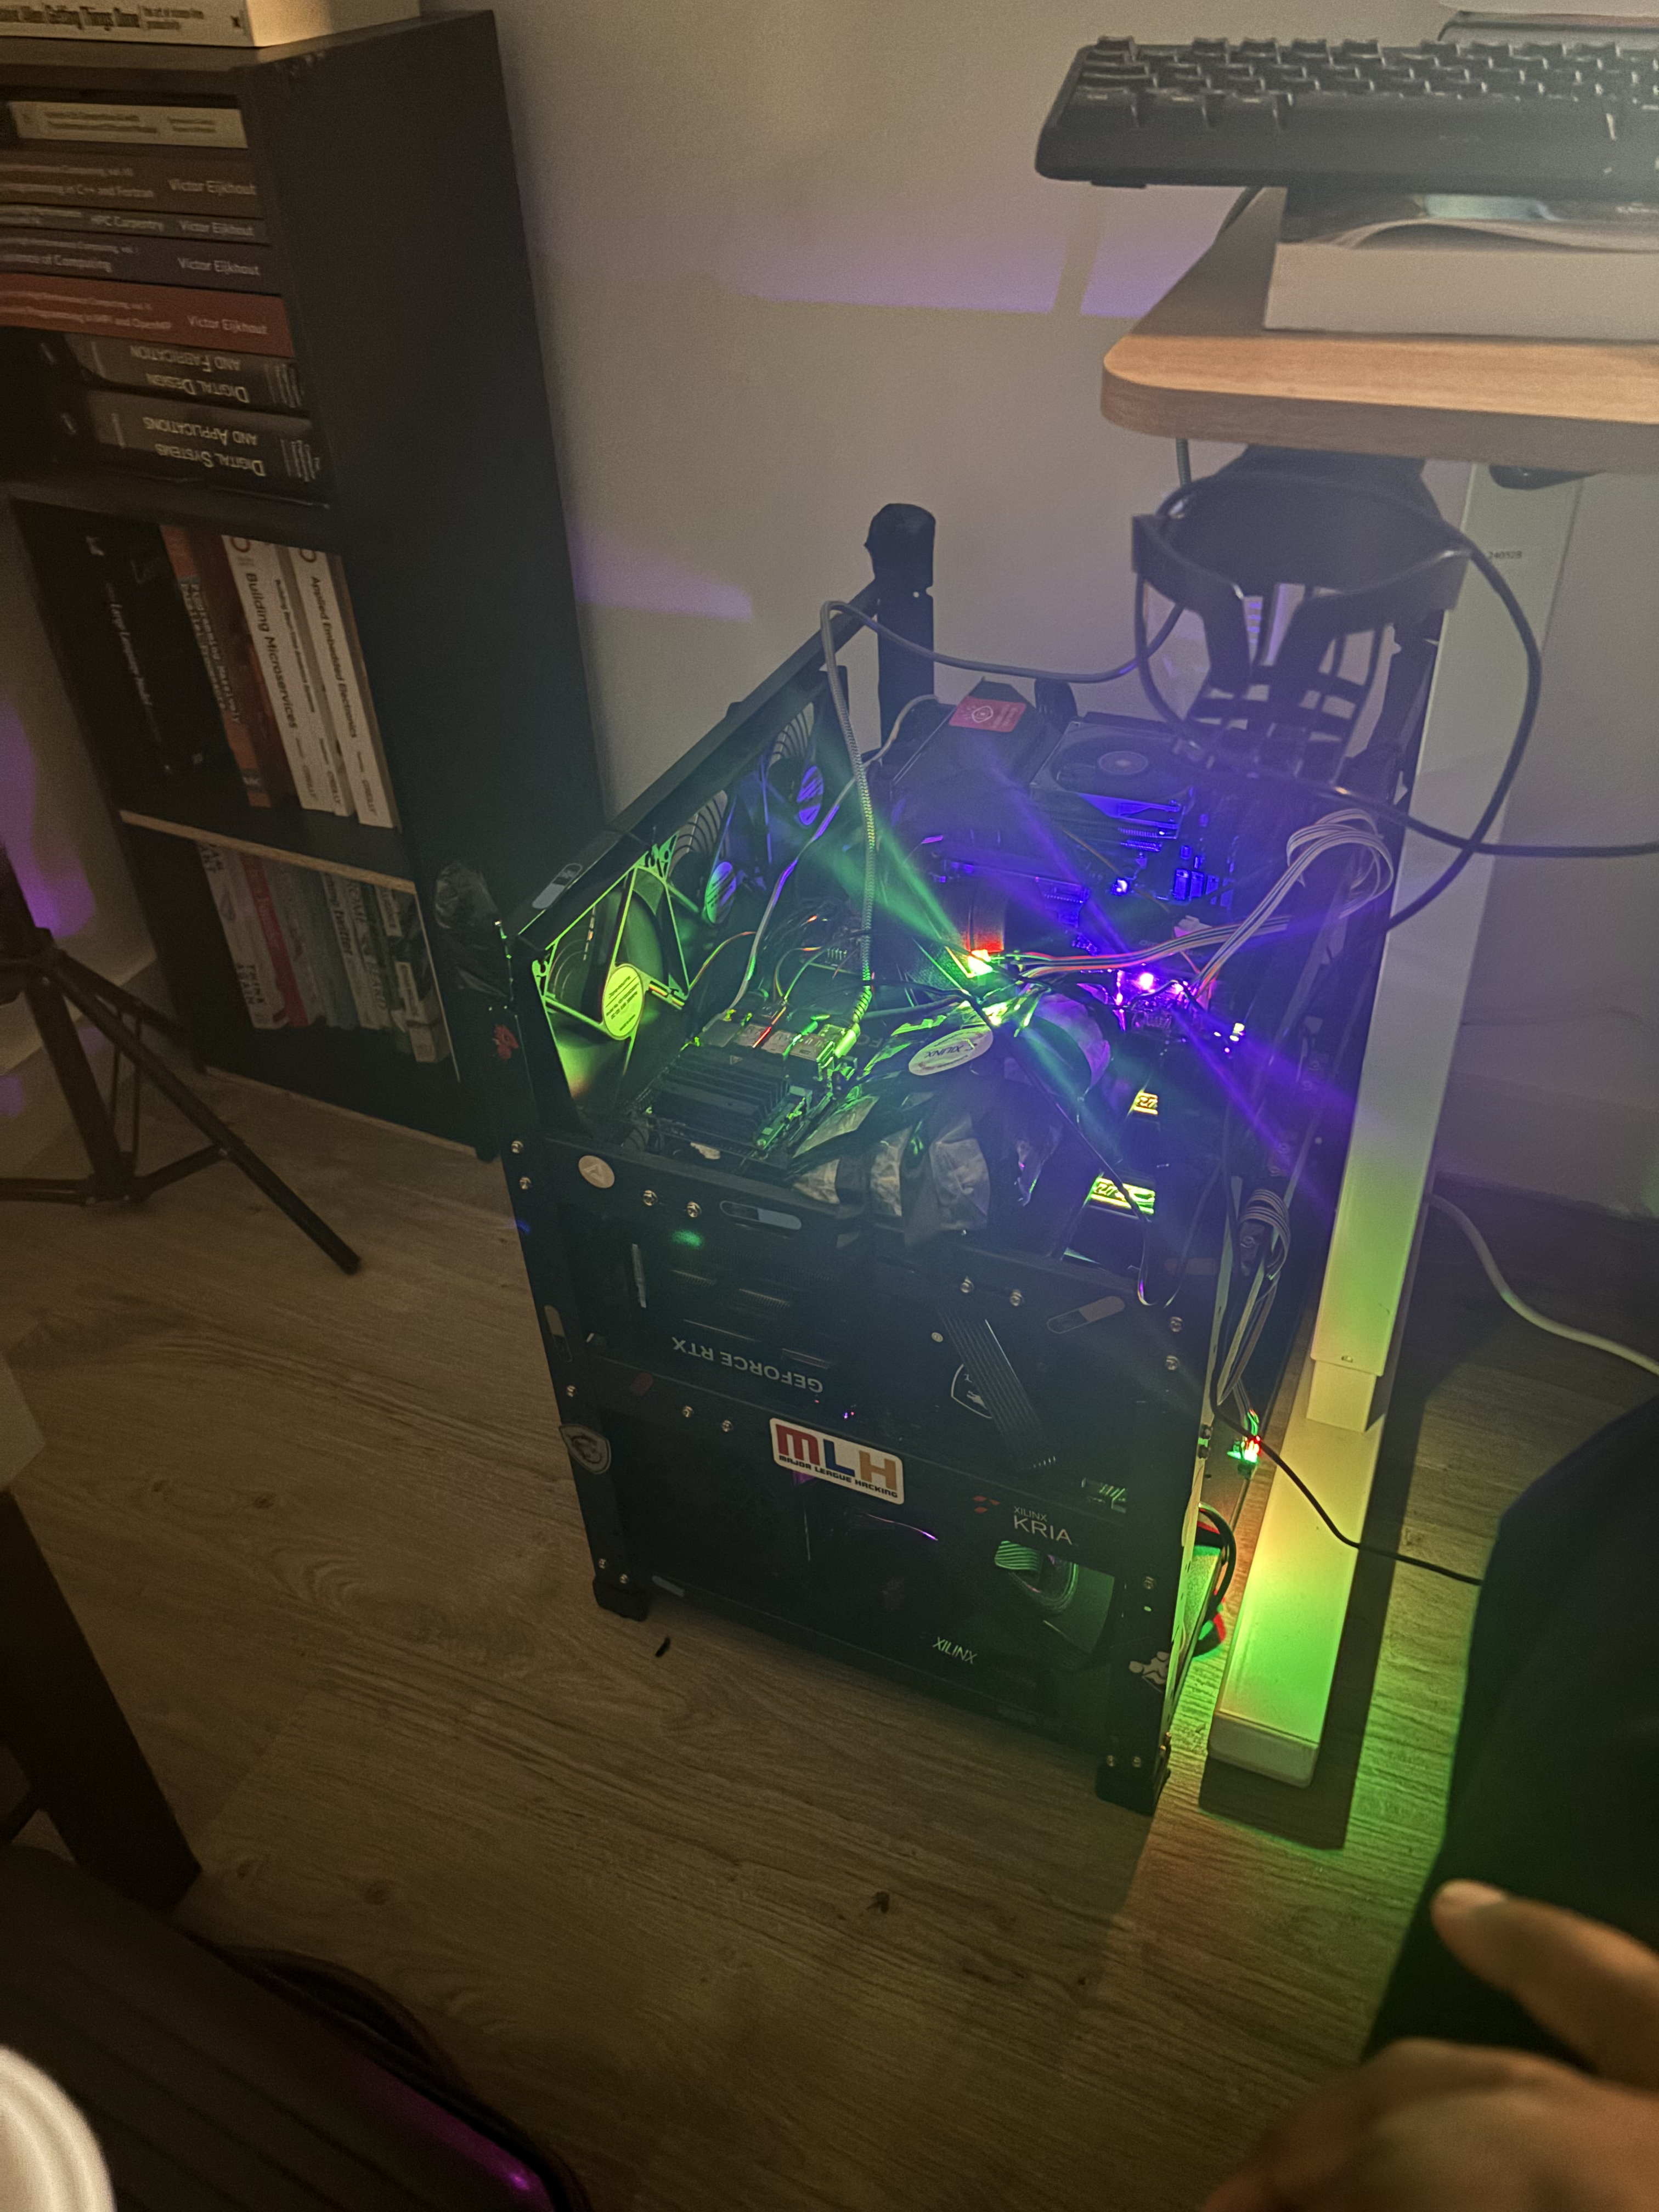
KAARL Cluster Build Complete
BIOS Configuration
Once we have the actual hardware set up we need to configure our BIOS (the software that loads before our operating system) to load Nvidia drivers for our GPU when available.
This is one of those subtle steps that can be missed easily and can even add a few hours to days in the setup process. For my cluster I'm making use of Ubuntu 24.04. The BIOS process
may differ based on the motherboard you are using, but I'll go over the steps I used in my own setup.
Enter BIOS
Power on the machine and press the delete button repeatedly to enter the MSI BIOS page. Disable secure boot (required for NVIDIA driver installation)
If Secure Boot is left enabled, the NVIDIA kernel module will fail to load after driver installation. You will see a black screen or
nvidia-smiwill returnNo devices found.
BIOS changes
These are not strictly required but improve stability:
-
Enable Above 4G Decoding — allows the system to properly address GPU memory above 4GB over PCIe
-
Enable Virtualization (AMD-V / SVM) — required for some container runtimes and future VM workloads
Save and exit. The machine will reboot.
Choosing and Installing the right operating system
I knew from the get-go I would have to use Linux for the cluster, but then I had to pick the right distro and the right version. I settled on Ubuntu 24.04 due to its recency and support for most deep learning libraries, CUDA and ROS.
Installation process
On another machine, download Ubuntu 24.04 LTS and flash it to a USB drive:
Alternatively use Balena Etcher on Windows/Mac. Boot from the USB drive (press F11 on MSI boards for boot menu) and follow the installer:
- Language: English
- Keyboard: Your layout
- Installation type: Ubuntu Server (no GUI needed on worker nodes; install desktop on Node 1 if you want a local display)
- Storage: Use the 512GB SSD as the installation target. Leave the 8TB HDD unconfigured for now (Node 1 only).
- Network: Configure ethernet. Note the IP addresses assigned to each node.
- Profile setup:
- Node 1: username
kaarl, hostnamekaarl-bignode1 - Node 2: username
kaarl, hostnamekaarl-bignode2
- Node 1: username
- SSH: Enable OpenSSH server during installation
On both nodes:
Network Configuration
Kubernetes and Ray require stable node addresses. Configure static IPs via Netplan:
Verify:
To Configure the /etc/hosts, on both nodes, add entries so hostnames resolve without DNS:
Now let's configure SSH key access between nodes
Setting up NVIDIA Drivers and CUDA
Now we have our compute nodes built and set up. You can now start ssh'ing into them and running programs on them. Our use case is focused on deep learning and robotics. Therefore we would need an accelerator for performing scientific computing operations, and this is where NVIDIA and CUDA come in. Nvidia is the actual accelerator hardware which can be used for graphics by default, but we would want to write and run scientific computing applications on it, and to do so we will need to install CUDA. CUDA is the library that actually allows us to utilize the vector computation built natively into the GPU to run our accelerated computing workloads. Most of the libraries we would be using for our experiments, such as PyTorch, have already written the code that bridges our application use case to CUDA, so in most cases we would not need to write any CUDA code ourselves. We are setting up CUDA for our AI libraries to use. If you've seen the memes online you'd know that this is one of the more annoying steps. You'd want to be careful here and verify your work each step of the way.
CUDA installation process
Repeat on both nodes.
Verify GPUs Are Detected
Install NVIDIA Drivers via apt
Verify Driver Installation
Expected output:
If nvidia-smi fails:
- Confirm Secure Boot is disabled in BIOS
- Check
dmesg | grep -i nvidiafor errors - Ensure the driver version matches your kernel:
apt install nvidia-dkms-560
Install CUDA Toolkit
The NVIDIA driver already includes CUDA runtime libraries. The toolkit adds nvcc and development headers for building custom CUDA code:
We now need to persist GPU Settings, enable persistence mode so the driver stays loaded between reboots:
Installing Miniconda for environment management
We will be running multiple projects in parallel with conflicting dependencies, or we could simply want one project to have a
different python version than the others. Miniconda allows us to easily configure and maintain multiple python environments without having them tied to any directory (as done with python-venv). Miniconda environments
are global and can be used from anywhere in the system, and each environment can be used by multiple projects irrespective of the folder location of each project. You do not need to track any venv or .venv folder in your
project codebase because Miniconda handles the location and usage of your environments. It is very convenient if you plan to reuse certain environments across projects or if you need specific environment specifications for your project
without affecting the base python installation. The installation process is as follows.
Repeat on both nodes (or at minimum on Node 1, which you'll use as the control machine).
Install K3s (Kubernetes)
We have both nodes configured, running and communicating with each other. For a lot of simple use cases this would be enough. You could simply SSH into each node and execute whatever programs you want. You can have them communicate over the network to transfer data. Even PyTorch has a set of functions to allow training across nodes on a network. Other newer libraries like Exo allow you to run large model inference across multiple accelerated nodes in a network. For our use case we would want to run complex cluster workloads and build a developer experience where we would simply specify what capacity we need and configure the environments, and the orchestration system would provide the runtime and its requirements for us.
This was to mimic the functionality typically provided by the cloud AI infrastructure companies, but running on my own hardware in my own home. We would be using Kubernetes (through K3s, which is a lightweight version of Kubernetes that fits our exact use case) for compute orchestration. Kubernetes is what directly manages our nodes, checks their health, places jobs on them, manages volumes and persistent storage, handles capacity management and recovery etc. We would run Ray on top of this for the actual cluster, node and job management, but we will cover Ray in later sections.
The setup process for Kubernetes is node-specific and goes as follows.
Install K3s on Node 1 (Master)
Join Node 2 as Worker
On Node 2:
Configure kubectl on Node 1
Verify Cluster
Note: K3s uses
containerdas its container runtime, not Docker. You cannot rundocker buildordocker pushcommands. Use pre-built images from registries instead.
Install Nvidia GPU Operator
The GPU Operator installs and manages the NVIDIA device plugin, which exposes GPUs as schedulable Kubernetes resources.
Install Helm
Install the GPU Operator
Important: Pass
--set driver.enabled=falsebecause you already installed the driver manually via apt. If you let the GPU Operator install the driver, it will conflict with your existing installation.
Verify GPU Operator
Test GPU Scheduling
Installing KubeRay Operator
The KubeRay Operator is the service that allows our Kubernetes environment and our Ray cluster to have bi-directional communication and pass messages and instructions between each other. It is a convenience library that allows us to quickly set up Ray correctly in a Kubernetes environment.
Save as ~/ray-cluster-values.yaml:
Key decisions in this config:
num-cpus: '0'on head — prevents compute tasks landing on the head nodepodAntiAffinity— ensures the 2 workers land on different physical nodes (1 per node, 2 GPUs each)replicas: 2fixed — no auto-scaling, workers always ready for instant job start
Deploy
The
rayproject/ray:2.40.0-py311-gpuimage is ~5GB. First pull takes 15–20 minutes per node.
Wait for Pods
Verify Pod Distribution
Verify GPU Allocation
Using Ray from the Host
Now that our Ray operator is running properly on Kubernetes, we would like to be able to submit ray tasks from our local code using the ray client library.
Create Python Environment
The Ray client Python version must match the cluster exactly (the version of python running on your cluster must be the exact same version of python running in your environment; if this is not configured properly it can cause nasty, confusing errors).
Start Port-Forward
Kubernetes services are not exposed externally by default. Use port-forward to access Ray from the host:
- Port
8265→ Ray Dashboard (browser) - Port
10001→ Ray Client (Python)
Test Connection
Troubleshooting Port-Forward
To validate GPU access let's ensure we can actually use our GPUs for jobs execution from Ray
Expected output:
First run: 3–5 min (Ray installs PyTorch on workers). Subsequent runs: 30 seconds (cached).
Cluster Management Scripts
Save all scripts to ~/ray-cluster-scripts/ and run chmod +x *.sh.
ray-connect.sh
ray-status.sh
ray-scale.sh
ray-stop.sh
ray-start.sh
Running a simple Hugging Face transformers inference job on our cluster
A quick sanity check to ensure everything is working properly. We will try to run DistilBERT on a single GPU using the Hugging Face inference library.
This will create a worker based on the specified runtime environment, execute the inference task and return the results outside of the job worker. This means that our local environment where the python script is being executed does not need to have a GPU; we can simply specify in Ray the environment we would like to execute that function in, and Ray handles the rest and gives us back the results, which we can then use downstream in our application.
Running vLLM Across Both Nodes for Tensor and Pipeline Parallelism
Running vLLM directly on the host only uses the 2 GPUs local to that node. To span all 4 GPUs across both nodes, use the Ray distributed executor backend.
Install vLLM
Ensure Ray Is Connected and Visible
Launch vLLM Server (All 4 GPUs)
Run once on Node 1. Ray handles distribution to both nodes automatically:
--distributed-executor-backend ray— connects vLLM to the Ray cluster--tensor-parallel-size 4— splits the model across all 4 GPUs- Ray places vLLM workers on both nodes automatically
For Large Models: Tensor + Pipeline Parallelism
Test the Server
Helper Script: start-vllm-ray.sh
Running SGLang Across Both Nodes
SGLang is an alternative LLM serving framework with faster structured generation. Setup is nearly identical to vLLM.
Install SGLang
Launch SGLang Server (All 4 GPUs)
Key Differences from vLLM
| Parameter | vLLM | SGLang |
|---|---|---|
| Tensor parallelism | --tensor-parallel-size | --tp |
| GPU memory | --gpu-memory-utilization | --mem-fraction-static |
| Launch command | vllm serve | python -m sglang.launch_server |
| Ray backend | --distributed-executor-backend ray | --distributed-executor-backend ray |
Model Size Reference
| Model | Size | VRAM Needed | Strategy |
|---|---|---|---|
| Mistral-7B | 7B | ~14GB | --tensor-parallel-size 4 |
| Llama-2-13B | 13B | ~26GB | --tensor-parallel-size 4 |
| Llama-2-30B | 30B | ~60GB | --tensor-parallel-size 2 --pipeline-parallel-size 2 |
| Falcon-40B | 40B | ~80GB | TP=2 PP=2 + --quantization awq |
| Llama-2-70B | 70B | ~140GB | Exceeds 64GB cluster VRAM |
Key Design Decisions
No auto-scaling: Kubernetes GPU allocation does not block host process access to GPUs. Host tools like Ollama can still use the GPUs even while Ray workers are running, since they share physical GPU memory. Auto-scaling was therefore skipped — keeping workers always running avoids 30–60s startup latency with no meaningful benefit.
runtime_env over custom images: K3s uses containerd and image builds require elevated access. Ray's runtime_env installs packages on workers on demand and caches them, making it the simpler and recommended approach.
Fixed worker placement per node: The podAntiAffinity rule in the Ray cluster config ensures one worker per physical node, giving each worker exactly 2 GPUs. Without this, both workers could land on the same node, leaving the other node's GPUs unused.
Troubleshooting Reference
| Symptom | Likely Cause | Fix |
|---|---|---|
nvidia-smi fails | Secure Boot enabled | Disable in BIOS |
GPUs not in kubectl describe node | GPU Operator not ready | kubectl get pods -n gpu-operator |
| Ray shows only 2 GPUs | Both workers on same node | Check pod anti-affinity; check kubectl get pods -n ray -o wide |
| Port-forward drops | Old kubectl process | pkill -9 kubectl then ./ray-connect.sh |
| vLLM uses only local GPUs | Missing Ray backend flag | Add --distributed-executor-backend ray |
| Python version mismatch warning | Minor patch diff (3.11.10 vs 3.11.15) | Harmless — can ignore |
Quick Reference Cheatsheet
If you followed all the steps properly you should have your own AI infrastructure ready to use! Run training, finetuning and inference jobs from anywhere easily. You now have
sovereignty over your AI; you now Own your own AI future. This is just the beginning. The actual journey is in the projects you build with it and how you tweak it to your taste.
KAARL stands for Kosi's Advanced AI Research Laboratory.